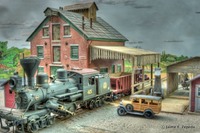
October 9, 2011
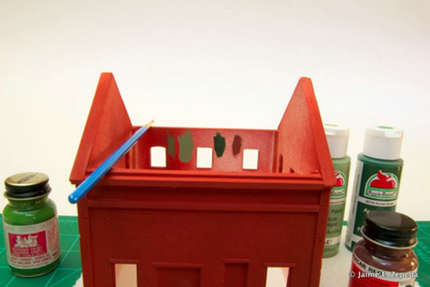
George's instructions direct the modeler to use red oxide primer from a spay can to prime the brick structure. Karl mentioned in his thread that he used Ace brand red oxide primer. I am sure one brand is as good as the other. Since there is an Ace Hardware down the street from my house I went with that brand as well.
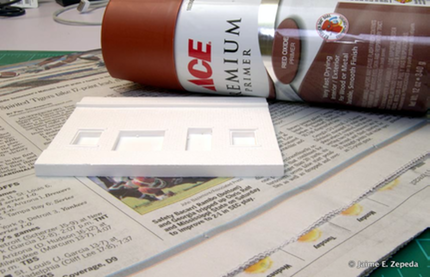
Before priming the brick structure George suggests sanding the roof line on the castings to knock off any high spots and even out those surfaces. To do so one needs to take sandpaper (220 grit as instructed in instruction sheet "A") and rub the roof line on it a couple of times by turning the structure upside down onto the sand paper. Be sure to work on a level surface.

I gave the structure a good once-over to make sure I'd done a good job cleaning it before going out in the yard and spraying on the primer.
I am going to need to invest in a good paint booth. The weather has been great so it was a pleasure to spray paint all this stuff out in my back yard. But, that won't always be the case. Besides, while I don't mind trudging all the stuf out to the back yard and back in, the more I handle everything the more I risk damaging it.
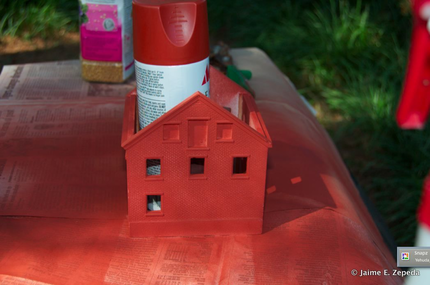
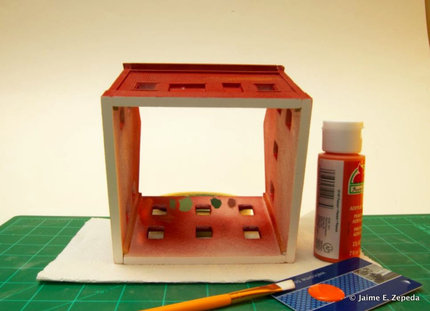
And so, I primed the first brick structure offered in an FSM kit. Well, not the actual first structure itself. But you get the point.
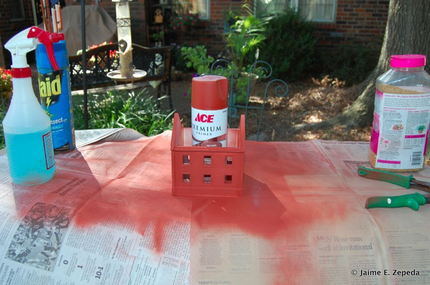
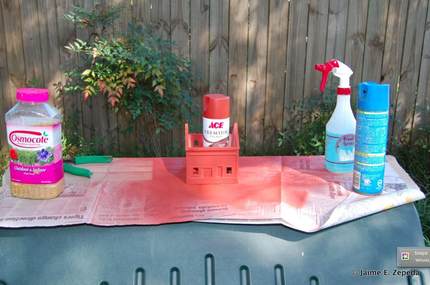
I had to weigh down the newspapers because we had a pretty good breeze the afternoon I primed the brick. I did not want to risk Graceland's latest goings-on getting stuck to my work.
You'll note that there is still some white showing through after having sprayed the primer. You'll need to spray from all angles and check your work as you go. I gather this may be easier if working in a spray booth. I've read and have been advised to place the model on a lazy Susan and turn the model as it is sprayed. I wanted to try that but could not find my lazy Susan I purchased at a yard sale a while back for that specific purpose.
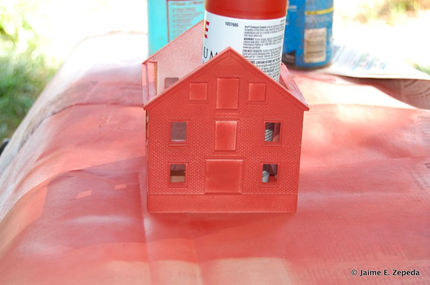
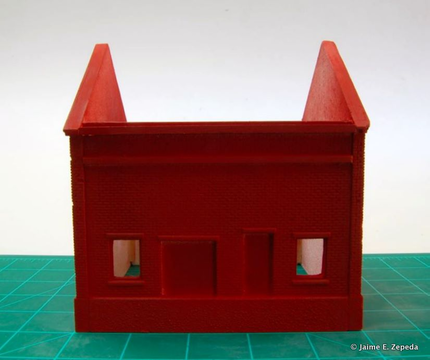
I brought everything back in and let Yehuda's bricks cure overnight.
It is necessary to allow the brick walls to cure after priming. I let mine cure overnight.
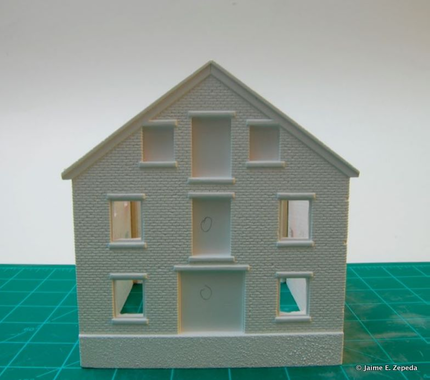
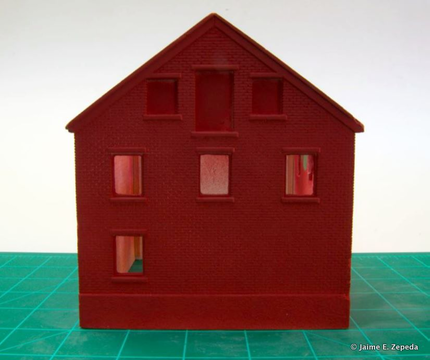
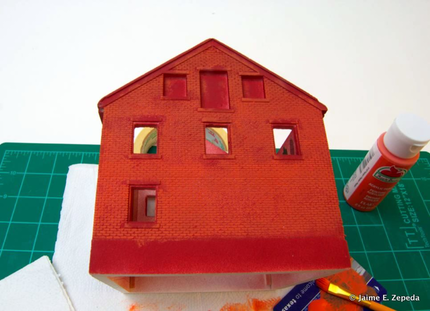
You'll notice that some of the details in the casting begin to pop out once primed. I first was concerned by the gap in the gable's peak. But when I referenced the kit's poster photos I noticed that area will be hidden in one gabled wall and overshadowed by the roof overhang in the other. So there was no concern for alarm.
While the brick was curing I decided to read ahead in the instructions so as to prepare for the actual painting of the walls. George instructs the modeler to use the following:
- Polly Scale "Reefer Orange" for the bricks. I opted for Apple Barrel Papaya, yummy.
- Polly Scale "Depot Olive" for the windows, its frames and the eaves and fascia. I did not have Polly Scale Depot Olive in my paints but did have Floquil Depot Olive. Oy vey! I should have gone and bought Polly Scale. More on that later.
- Polly Scale "D&H Grey" for the lintels and sills. I did not have this in my paints so instead I went with Smart Craft Grey, $0.58 per bottle.
- Floquil "Aged Concrete" for the stuccoed foundation. I did not have this in my paints so I went with Polly Scale Concrete.
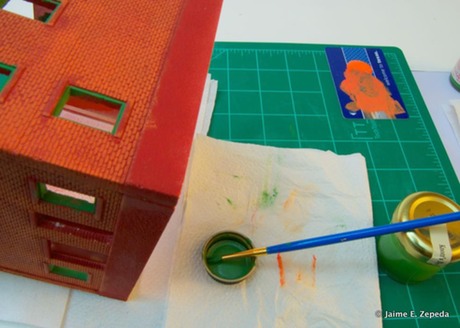
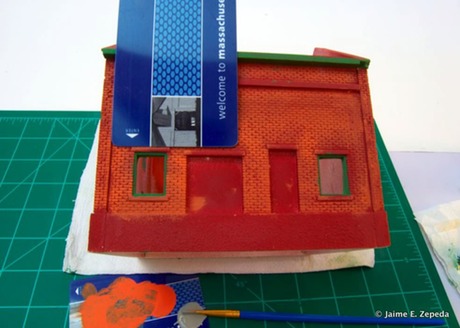
I decided I wanted to test what some of the trim colors I would like on the walls. So i did a little test on the back of one of the walls.
The Depot Olive looked best compared to Apple Barrel Wedgewood Green and Hunter Green. I tested Boxcar Red to see if it would make a suitable brick color. Boxcar Red is too dark. At this point I had not gone to buy the Apple Barrel Papaya, yummy, so you do not see it in the test above.
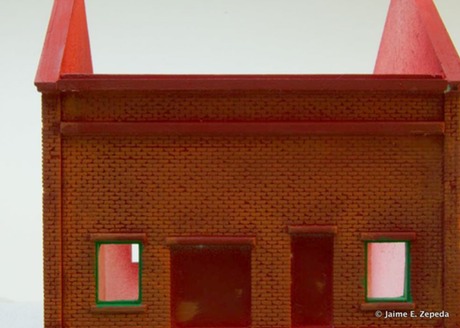
Throughout the rest of the build I will use two walls as examples of my progress. The first one is the wall I labeled "track". This wall faces the track and has a shed and loading dock attached to it. It is likely much of the detail on this wall will end up hidden.
The second wall is the one I labeled "lean-to". This wall is the rear of the building and has a lean-to attached to it. This is also the casting that keeps chipping on me.
And so, I wait for the brick to cure.
…
…
…
While the brick walls were curing. I decided to paint the window castings and the three doors for the first floor. I used Floquil Depot Olive for this. I also tested the Apple Barrel Papaya (yummy) on the bricks.
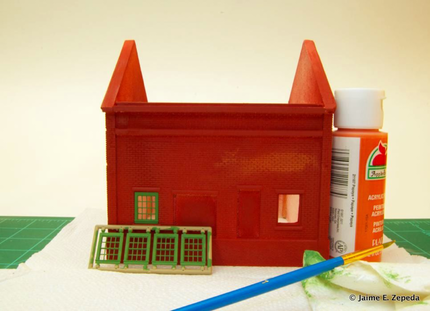
Even thought the Papaya (yummy) is quite bright on my hotel key card palette, it is not so on the brick. The Floquil Depot Olive looked good to me against the brick.
I proceeded to find the three doors for the first floor. And then I was perplexed. I found 4 doors. I checked against the poster to find photos to help me identify the three doors. Two of them were rather obvious. The third one was quite elusive. Can you guess which is the elusive third door?
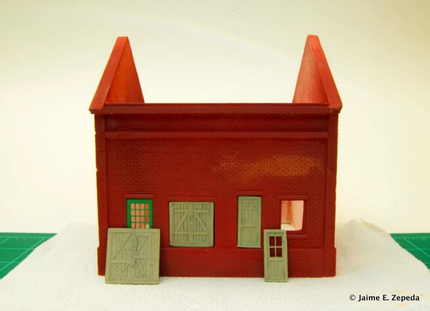
Yep, that's the one. The skinny one down on the paper towel. When I first test-fitted it where I though it ought to go, there was a gap at the top of the doorway. It couldn't be it. Fortunately I found the appropriate one.
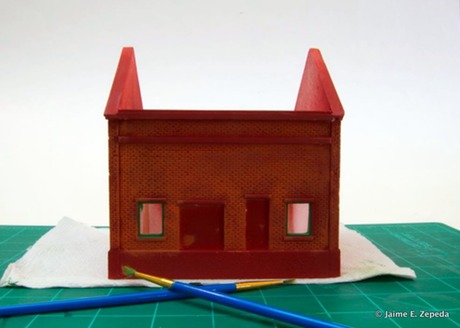
By the time I painted all 16 windows and the three doors, I was ready to paint on the Papaya (yummy). And, I was drunk on Floquil fumes.
CAUTION:
They really mean it when they say to work in a well-ventilated area when using this Floquil stuff. I had a nasty headache after painting the 16 windows and 3 doors. If you cannot work in a vented space when painting with Floquil, take breaks away from the workbench every so often. I know I wish I had.
So the Papaya (yummy) goes on.
I did all the painting under the light of my magnifier lamp. It makes a huge difference. Plus, because working under the magnifier exaggerates all your hand's movements, it forced me to work slow and steady. Even so, I managed to end up coloring outside the lines.
And a closer look.
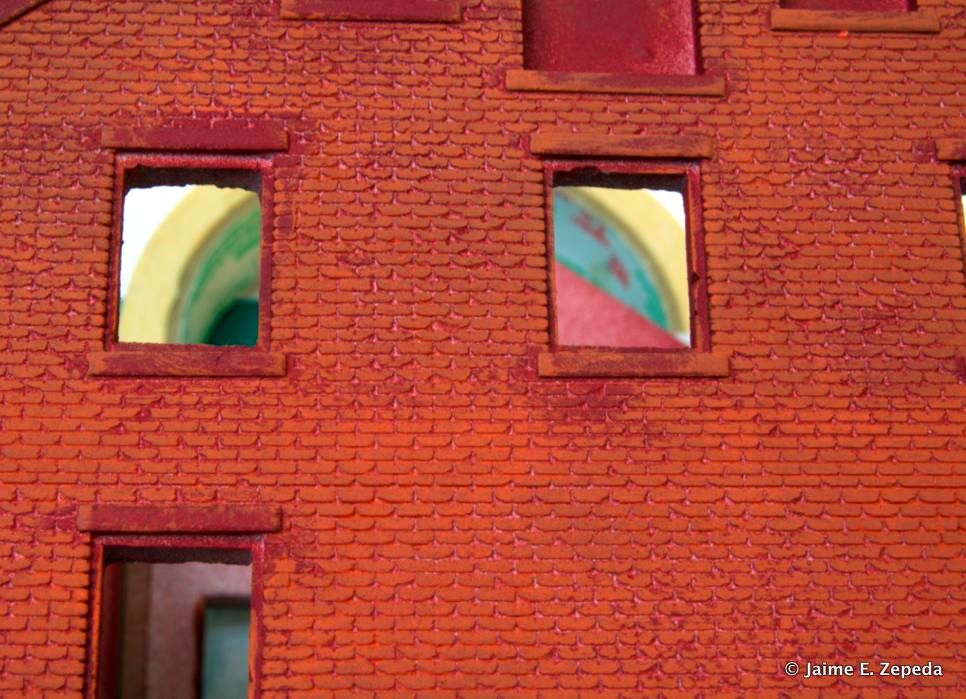
click the image above to view the full size photo in glorious detail
Painting on the Papaya (wait for it... yummy) went failry quick. And, the Apple Barrel paint dries quickly. And, it did not give me a headache like the evil Floquil.
I did my best to keep a steady hand while painting the 16 window frames. I worked under my magnifier lamp to keep my eyes from getting tired. I only wish I had chosen something besides "give you a nasty headache if you wok around it too long" Floquil.
And here are the first couple of windows.

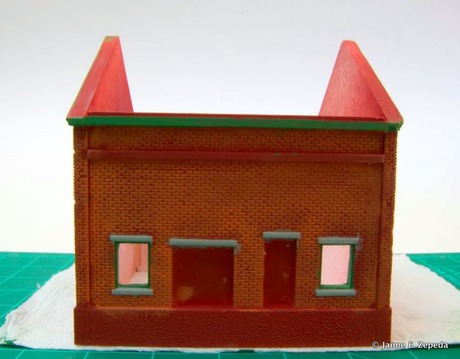
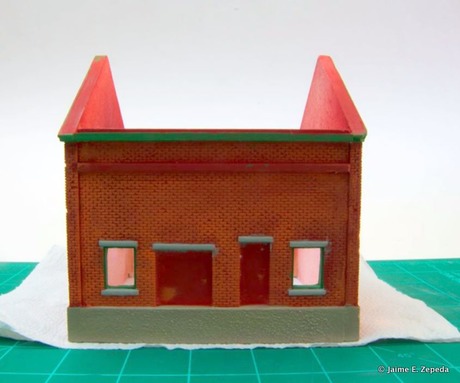
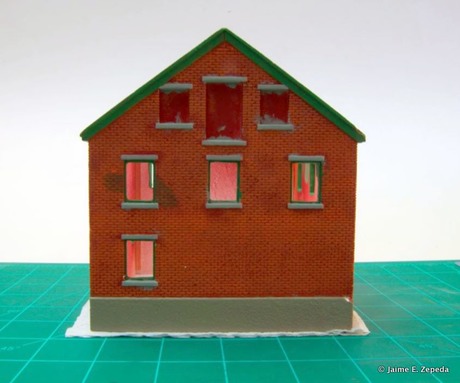
And here is a closeup. George instructs to paint the sides and the front of the frames. Again, I turned the structure around so I could view it from all possible angles to make sure I did not miss a spot. Along with the window frames, George instructs the modeler to also paint the eaves/facia Depot Olive.
You really only need a small amount of paint on your brush. To accomplish this I shook the Floquil jar and used whatever paint is left behind on the underside of the jar's lid. However, I figured out that if I used one of my hotel keycard palettes to "stop up" the jar I did not have to succumb to the "Floquil high".
I started out with a #1 round brush but that was too thick and switched to a #0 round.
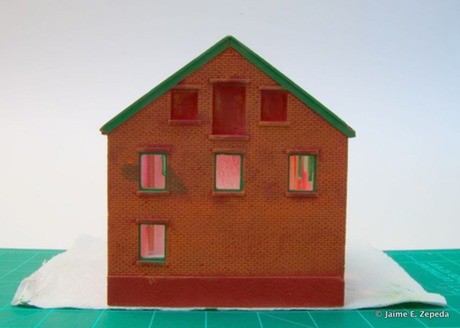
And here are the windows on the gabled wall.
There is no need for you to be diplomatic. That is an obvious boo-boo there. No biggie, I'll fix it later. I'd rather move on than dwell on it. Besides, it's only a toy train.
Once the 16 windows were done I moved on to the sills and lintels. I used craft smart Grey rather than George's recommended D&H Grey. I decided to mask the bricks by using my trusty hotel keycard palette. It would have worked better if all the lentils had been even. But it did the job.
It is not quite obvious when you look at the wall from the front. Those lintels and sills have surfaces above and below. I made sure to paint them as well. I noticed only when I turned the structure around so I could view all possible angles.
And here is the gabled wall.
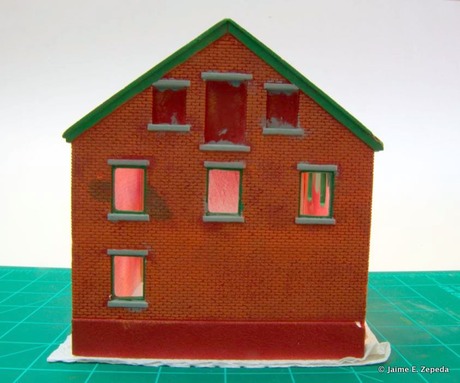
Try not to focus on the extra paint in the door openings. In retrospect I should have photographed the walls with the doors in place (not glued) to give it a more clean look. But, you should be aware that as you work through this it is likely the walls will look like a mess. Or perhaps it is just my sloppy painting.
Following the sills is the stuccoed foundation. I did not have "Aged Concrete" handy so I used plain Polly Scale "Concerete". Thanks to your input I've learned that Folk Art "Linen" is a good cost-effective substitute.
And the gabled wall.
I need more practice with the up-close painting bit. Even tough I was careful I still managed to color outside the lines. Perhaps I need a smaller brush. Maybe I should take breaks once the "Floquil high" comes knocking on my door. Better yet, I should switch to O scale or larger.
Next up, step 5; weathering the brick walls and adding mortar.