
Before I proceed with the step that calls to fill in the gaps left once the plaster walls are glued, I need to point out a small follow up regarding the gluing process. That follw up is found here.
October 8, 2011
OK. Let me refresh my memory. I've done a fair bit and I've added some extra stuff in between the steps in the instructions. It's amazing how much decision making is involved in the building process. I surmise many modelers take that decision making for granted. Perhaps because those modelers have already overcome those challenges and it is now just a matter of practice to "side step" around these issues.
Nevertheless, I'm telling like it is... for me.
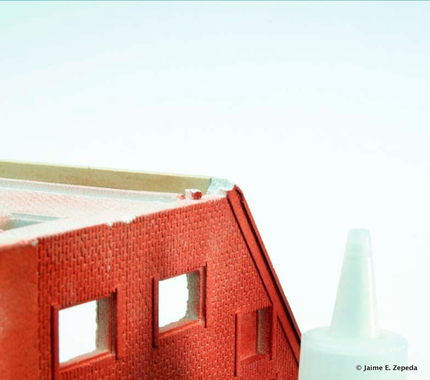
George instructs the modeler to fill in any gaps left after gluing the 4 brick walls together. Once thing I did prior to filling in the gaps was ensure that all 4 walls were glued square and in their right place :-) It was late at night when I left the epoxied walls curing. Who knows what I was thinking that late. So I checked my structure against the photos in the poster. I glued them in the right place. This hobby is so satisfying when things fall in place.
I gathered all that I needed to fill in the gaps. The instructions just say to use "some kind of filler (e.g. spackle)." Well, that was clear enough, I guess. So I asked Lisa if we had any spackle. Lisa knows where everything is in the house. I am not that good. I do well to keep up with my car keys and wallet :-) Anyway, Lisa walked directly to where the spackle is kept and retrieved it for me. She is a real sweetheart. Truly, she is.
I present you the gap filling accoutrements:
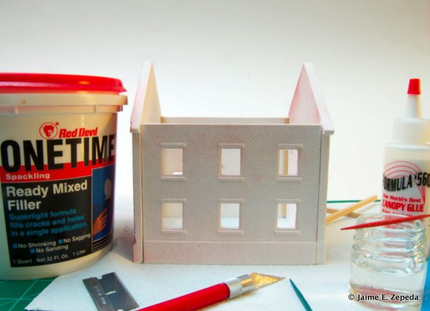
Here we have Red Devil ready mix filler, a small jar of water, an X-acto knife, some paper towels, a tooth pick, some Canopy glue (which must be kept FAR FAR AWAY from your laptop) and a single edge razor blade. What you cannot appreciate in the photo is the one missing tool that makes the magic happen, your finger tip.
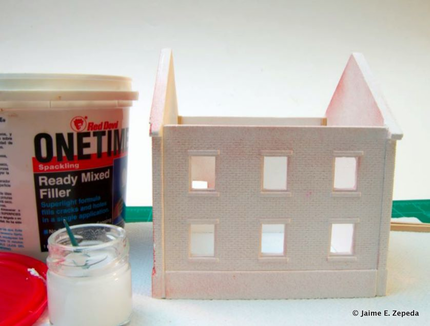
And thus, the gaps are filled:
Oh yeah. I need to explain how I did it.
- I dipped the X-acto blade in the spackle bucket and dipped some spackle.
- I dipped the X-acto blade laden with spackle in the jar of water.
- I waited for the spackle to turn into a slurry (this happens fairly quickly).
- I applied the slurry to the gap.
- I dipped my finger tip into the water jar to wet it.
- I smoothed the spackle slurry with my finger tip.
- I ran the tooth pick along the seam to "pick up" any excess spackle not needed in the gap.
- Rinse and repeat.
The process goes fairly fast. Be very careful not to get slurry on the bricks. If you do, just dip your finger tip in the water jar, wet it and wash out the slurry from where it should not go. It is very important to turn the structure so you can view it from all angles. You may think you have filled in the gap but it is deceiving. You need to view the gaps from all angles to make sure you have done a good job of filling them in with spackle.
Wow! That is quite a bit to keep in mind. Basically, you are giving the gaps a spackle wash.
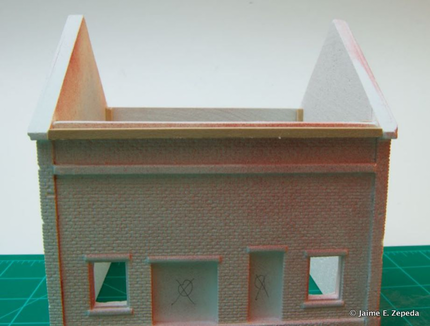
George then instructs to glue in the stripwood to which the gutters will attach. I trust you've read that discussion already. So, I corrected my boo-boo and did it how it is intended.
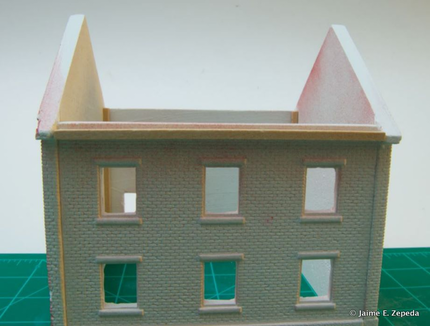
Perhaps you are curious as to why there is red primer on my walls at this point. I mean if you read the last sentence in this post it says the painting comes next :-)
You see, after an emergency confab with a trusted and respected award-winning modeler (who still had not received his kit at the time of the consulting session) I was advised to prime that wall as soon as possible to try to abate the chipping. So I heeded that advice. I'm no dummy. I know my limitations.
A fellow modeler, Dave Kotsonis, provided some advice as well in an earlier post. Thanks. I considered the ACC stop gap but opted not to follow through with it. But, I've filed that piece of advice away in the event I need to try something else.
I proceeded to prime that wall. And then I corrected my boo-boo. I was oh so very careful from then on. Neverteless...
The wall continued to chip off, mainly at the edges.
Next up, step 4; painting the brick walls.
